Installation
Before You Start
- Make sure you have Public and Private API keys to use as part of the setup process.
- Make sure that the WooCommerce extension is installed in your WordPress store.
Install The ChargeAfter Plugin
- In your WordPress dashboard, go to Plugins > Add New
- Click the Add New button on the top of the screen
- Search for the "ChargeAfter extension" in the search control on the right side of the screen
- Click Install Now > then, Activate Plugin button on the plugin banner
The extension is installed in the WordPress plugins store and activated

Wordpress Plugins Screen
Alternatively, contact the integration team and ask for the WooCommerce extension file
Configure The ChargeAfter Payment Method
-
In your WordPress dashboard, go to WooCommerce > Settings > Payments and select ChargeAfter Consumer Financing payment method:

-
Click the Manage button to redirect to the configuration page:
-
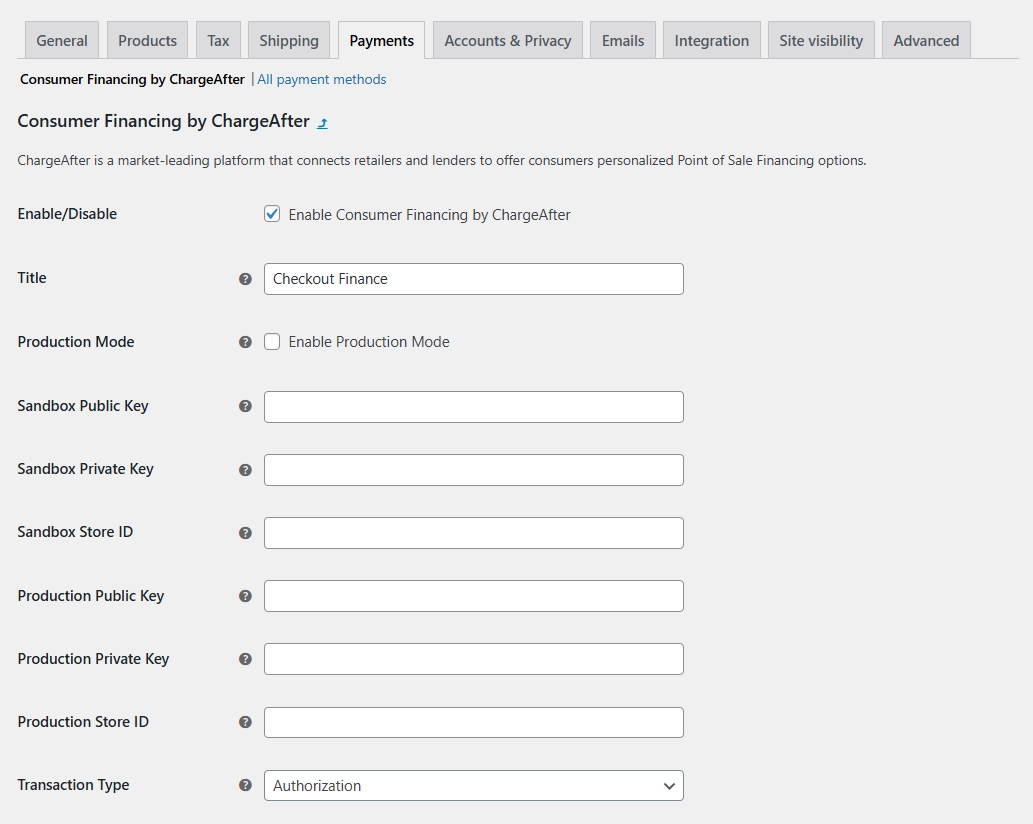
Fill in the configuration information:
Settings Description Default Enable/Disable Enable to make the module active No Title The caption appears on the checkout button Checkout Finance Enable Production Mode Set it when you are ready to go live. If unchecked, the sandbox mode is activated No Sandbox Public Key Your public sandbox key. Provided by ChargeAfter. Empty Sandbox Private Key Your private sandbox key. Provided by ChargeAfter. Empty Sandbox Store Id The ID is used to identify a specific store Empty Production Public Key Your public production key. Provided by ChargeAfter. Empty Production Private Key Your private production key. Provided by ChargeAfter. Empty Production Store Id The ID is used to identify a specific store Empty Transaction Type Set to capture enabling auto capture at the end of checkout experience. Otherwise, the transaction is authorized only and it requires manual capture operation later. Authorization Enable/Disable Data Update Once you receive updated information from ChargeAfter Checkout Flow, the information will be updated in Woocommerce Yes Checkout Brand Type You can set the type attribute for checkout branding according the space available to you - all available types medium-generic
-
-
Click the Save Changes button
-
You're done!
The ChargeAfter payment method is now available on the checkout page for your customers
Updated over 1 year ago
What’s Next
Did this page help you?