Add Promotional Widgets
Overview
A widget to be displayed on the product \ cart \ checkout pages. It informs shoppers that financing is available, it helps conversion by showing a low monthly cost, and allows the user to apply for financing ahead of checkout.
Promotional Widget
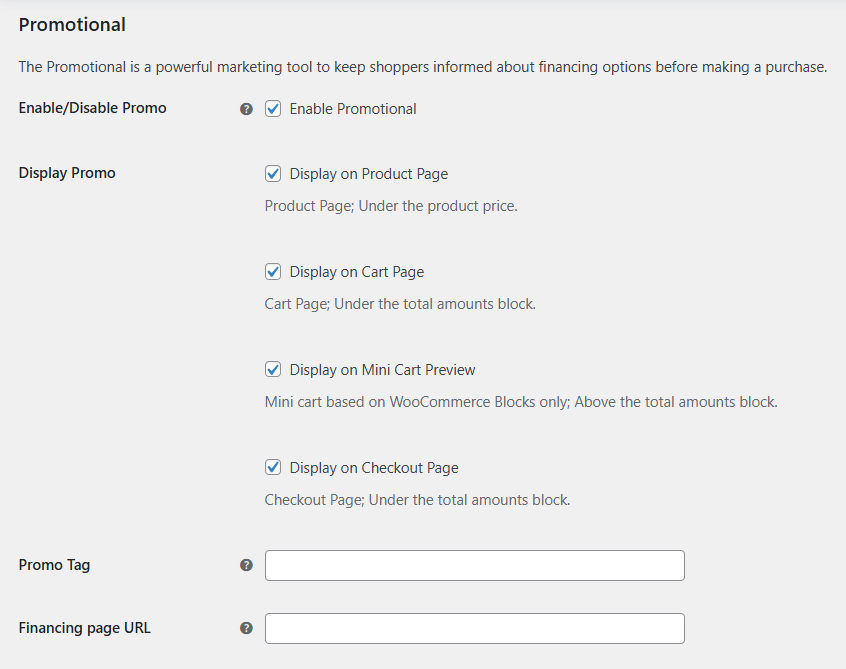
The promotion widget has been added to the page as a part of the ChargeAfter plugin. The promotional widget can be configured on the plugin settings page:
-
In your WordPress dashboard, navigate to WooCommerce > Settings > Payments and select ChargeAfter Consumer Financing payment method
-
Click the Manage button to redirect to the configuration page
-
Scroll down to the Promotional Widgets section and configure the promotional

Promotional Section
Settings Description Default Enable Promotional Widget Enable \ Disable Promotional Widgets Yes Display Promo Display on Product Page Once enabled it appears under the product price on the product page Yes Display on Cart Page Once enabled it appears under the cart total on the cart page Yes Display on Mini Cart Preview Once enabled it appears above the cart total on the mini-cart preview. It works just with a mini cart based on WooCommerce Blocks Yes Display on Checkout Page Once enabled it appears under the totals block on the checkout page Yes Promo Tag Used to apply promotions to select items or item categories. Empty Financing page URL Link to the financing page to notify the user of more detailed funding information. Empty
-
Save
Note
If you use page builder tools (e.g. Elementor) that block the WooCommerce events, please follow the manual installation for the Product Page Widget below.
Product Page Widget (Manual Installation on Elementor)
It is possible to add a promotional widget for a product manually (only works on the product page) using a short code:
[chargeafter-promo-product]
This may be necessary if your theme does not support WooCommerce hooks or you are using a page builder like Elementor:
-
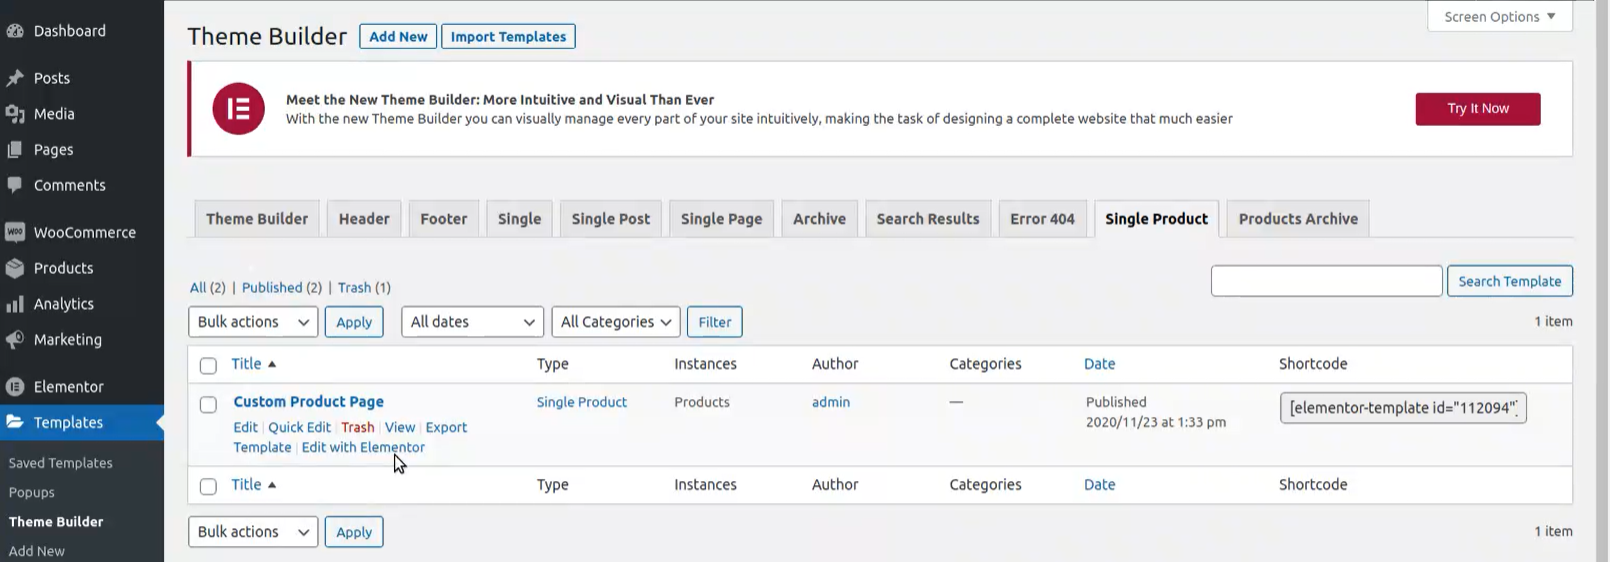
Go to Templates > Theme Builder > Single Product:

Templates List
-
Go to the template name, additional options appears underneath, and click Edit with Elementor
-
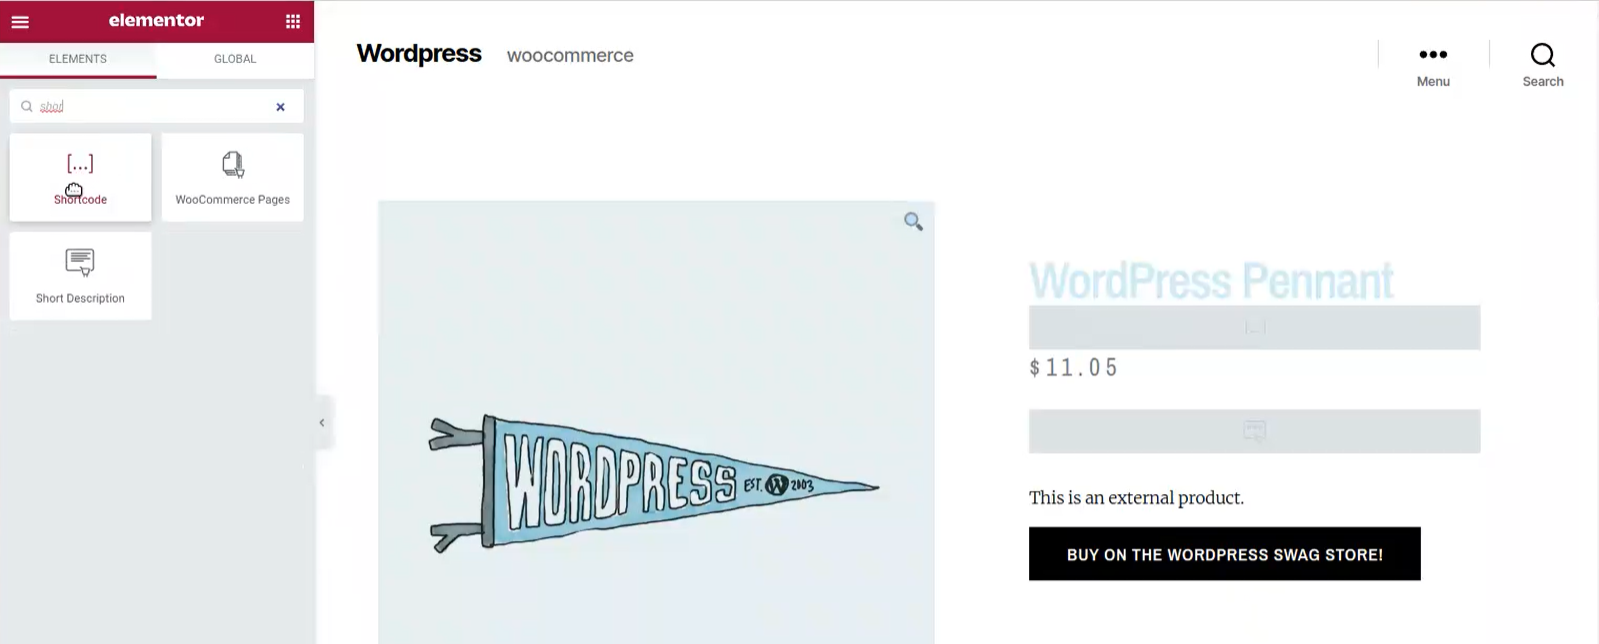
Search "shortcode" widget:

Editor
-
Drag and drop the widget to the desired promo location
-
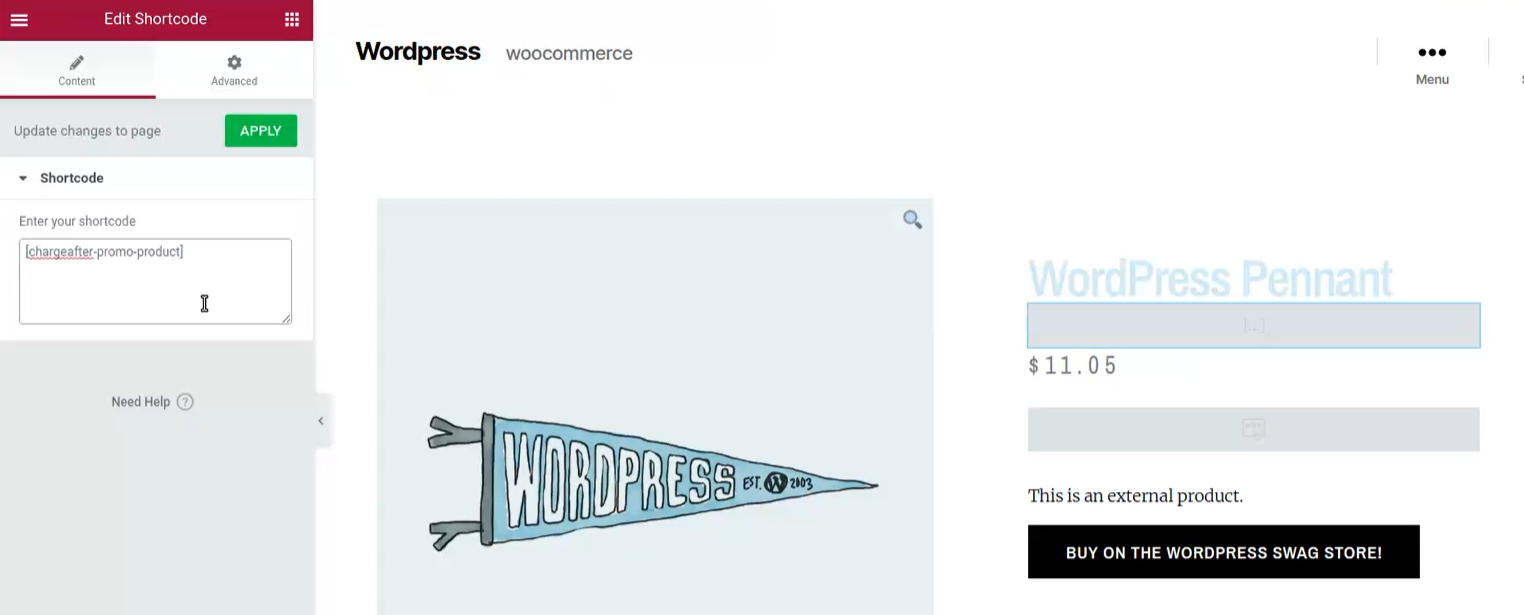
In the Enter your shortcode field, type [chargeafter-promo-product]

Shortcode Editor
-
Click the Apply button
-
Update
Cart & Checkout page widget
Once enabled promotional promo for cart \ checkout pages - must appear on pages automatically. However, you can use shortcodes to set promotional widgets manually:
// only works on the cart page
[chargeafter-promo-cart]
// only works on the checkout page
[chargeafter-promo-checkout]
Updated about 1 year ago
