Add Promotional Widgets
Overview
Product Page Widget are used on product pages to inform shoppers of possible promotios and a suggested monthly payment. More details on the product page widget can be found here.
Adding Promotional Widgets
- Navigate to the Apps configuration page:

-
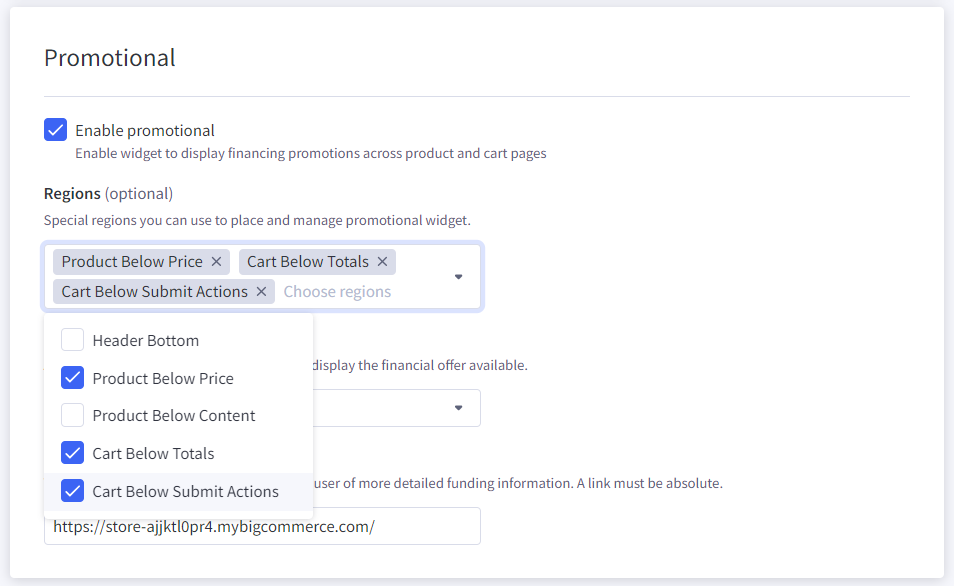
Under Promotional, choose the view regions where the widget will appear.
There are 3 predefined view areas:
(1) Header Bottom: Bottom part of the product header
(2) Product Below Price: Under the price of the product
(3) Product Below Content: Under the product description
(4) Cart Below Totals: Under the cart line items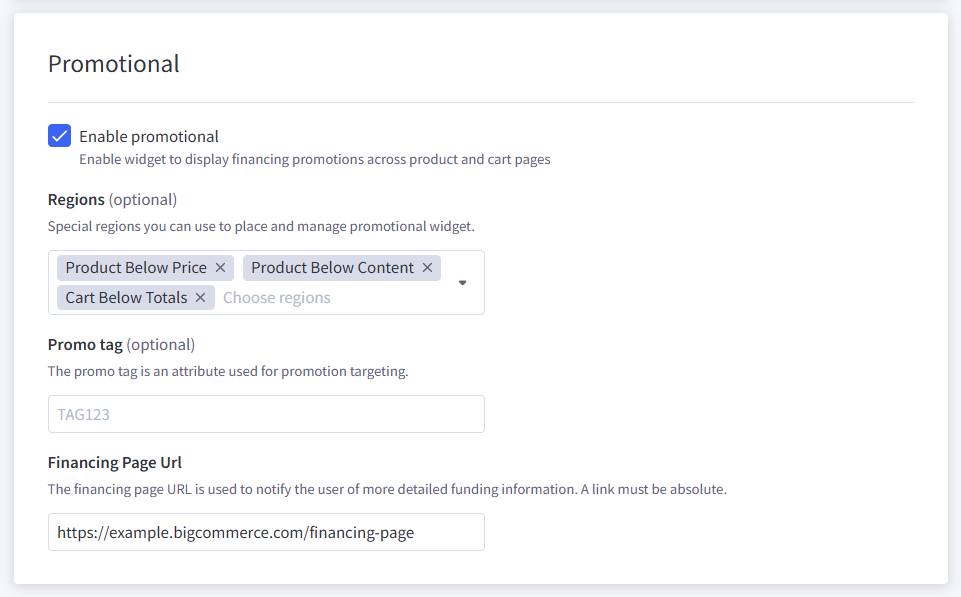
Promotional Section
-
Click the Save button
Promotional on Cart Preview and Product Quick Modal
To apply promotional on cart preview and product quick modal need to add minor changes to your theme.
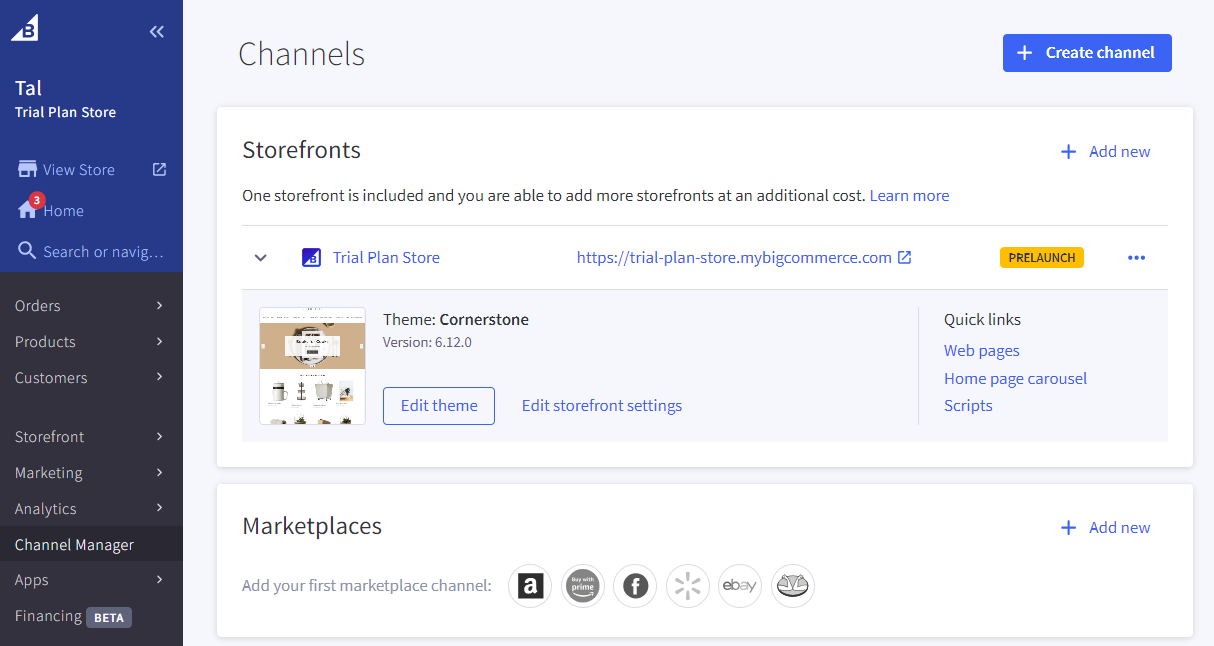
- Navigate to the Theme Editor: Admin > Channel Manager > Your Channel > Theme
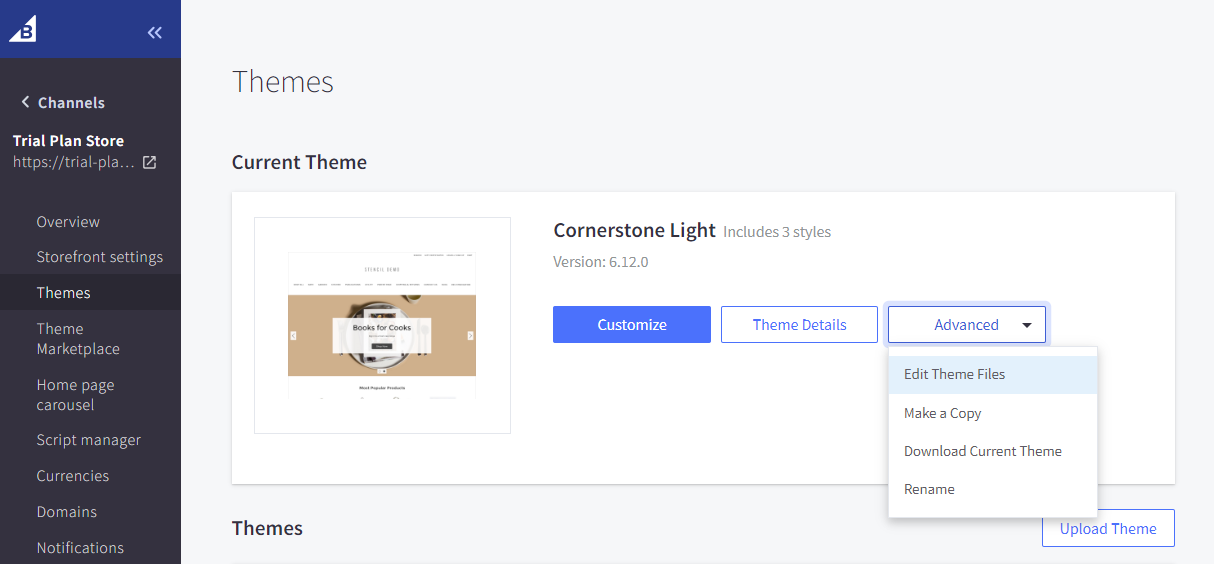
- Click on the Advanced button > Edit Theme Files
Theme Backup
We recommended doing theme copy before editing
- Open file
templates/components/cart/preview.htmland add the next code insidepreviewCartCheckoutblock:<!-- This is cart preview section --> <section class="previewCartCheckout"> ... <!-- Custom code inside previewCartCheckout section --> <div data-content-region="ca-preview-cart"></div> ... </section> - Open file
templates/components/products/quick-viewand wrap a code{{> components/products/product-view}}in next block:<!-- Custom wrap code with product view inside --> <div class="ca-quick-product" data-product-sku="{{product.sku}}" data-product-price="{{#if product.price.with_tax}}{{product.price.with_tax.value}}{{else}}{{product.price.without_tax.value}}{{/if}}"> <!-- This is quick product view content --> {{> components/products/product-view}} </div> - Save and apply changes
Extending Product and Cart Pages
To add promotional widgets on new custom areas for cart or the product pages, update theme regions via the theme editor and then update applied regions on the promotional settings.
In BigCommerce, regions are specific locations in the Stencil theme template files where you can place a widget. You can add a region at the cart \ product file level using the format {{{region name="..."}}}.
Best Practice
Give a region name that is descriptive of the location and function
- Navigate to the Theme Editor: Admin > Channel Manager > Your Channel > Theme
- Click on the Advanced button > Edit Theme Files
-
Open file
templates/pages/cart.htmlfor cart page ortemplates/pages/product.htmlfor product page, add a new region:{{{region name="..."}}} <!-- For Example: new region after submit buttons on cart page --> {{{region name="cart_below_submit_actions"}}}Note. You also can add new regions on nested components, for example, file
components/products/product-view -
Click on Save & apply all files button
-
Navigate to the Apps configuration page: Admin > Apps > Choose app
-
Under Promotional, choose the newly added regions where the widget will appear.
-
Click the Save button
Updated over 1 year ago