Add Promotional Widgets
The Promotional Widget appears in the Product Page to advertise that financing offers are available for that product. The widget helps to increase conversion and AOV.
Creating a Widget
To configure the promotional widget, follow the steps below:
- Navigate to the Magento2 Admin site > Content > Elements > Widgets
- Click the Add Widget button:

- Fill in Settings field by following the table below:

| Settings | Value |
|---|---|
| Type | Chargeafter Payment Promotional Widget |
| Design Theme | Your current theme |
- Click the Continue button
- In the Storefront Properties section, fill in fields per table below:

- For Widget Title, enter a descriptive title for the widget.
This title is visible only from the Admin. - For Assign to Store Views, select the store views where the widget will be visible.
You can select a specific store view, or All Store Views. To select multiple views, hold down the Ctrl key (PC) or the Command key (Mac) and click each option. - (Optional) For Sort Order, enter a number to determine the order this item appears with others in the same part of the page. (0 = first, 1 = second, 3 = third, and so on.)
-
In the Layout Updates section, click on Add Layout Update
-
Set Display on to the type of page where it is to appear. In the Container list, choose the area of the page layout where it is to be placed:

- Navigate to the Widget Options tab in the left panel > fill in fields as per table below:
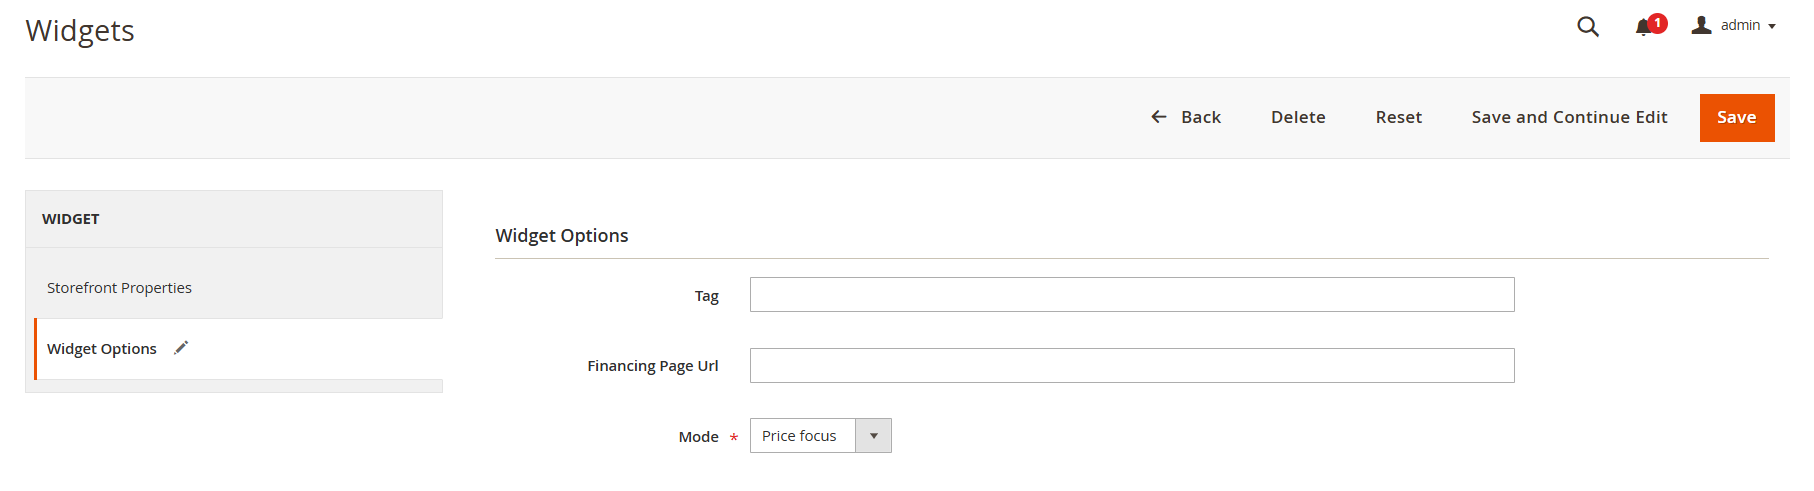
| Settings | Value |
|---|---|
| Tag | Used to apply promotions to select items or item categories. Optional, defaults to empty |
| Financing Page Url | Must include a link to the financing page |
| Mode | Brand-focus or Price-focus for the widget. Optional, defaults to "price-focus" |
Updated over 1 year ago
What’s Next
Did this page help you?