Installation
Integrating ChargeAfter’s financing solution requires installing two software components:
- Payment Gateway
- ChargeAfter Apps
Use the URLs below to activate the gateway and install the app in production and pre-production (sandbox) environments correspondingly.
- For the ChargeAfter - Production app: https://shopify.chargeafter.com/
- For the ChargeAfter - Sandbox app: https://shopify-sandbox.ca-dev.co/
Type your store’s primary domain (for example, example.myshopify.com) within the installation form.
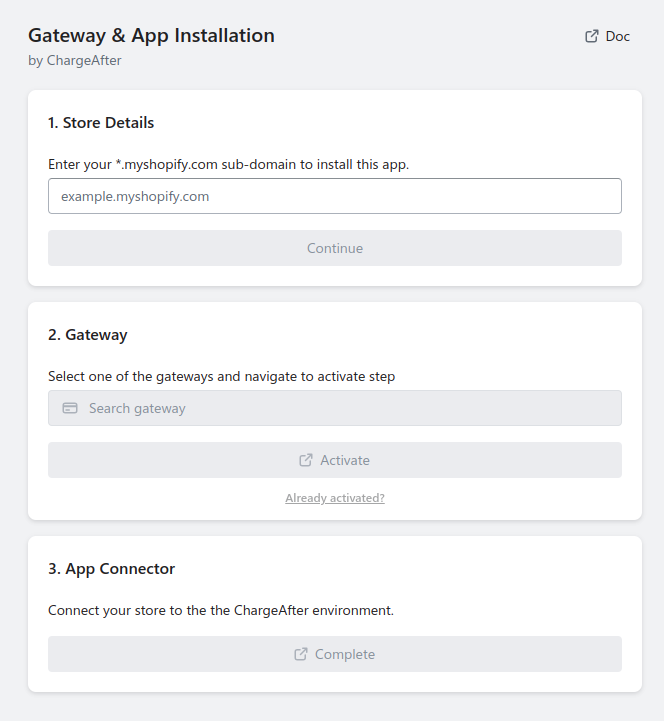
Activate Payment Gateway
Payment gateway activation allows adding a payment method item on a store checkout. If the payment gateway is already activated for Sandbox or Production, insure the Test mode option for payment setting on your admin.
- Select one of the gateways and navigate to the payment settings page
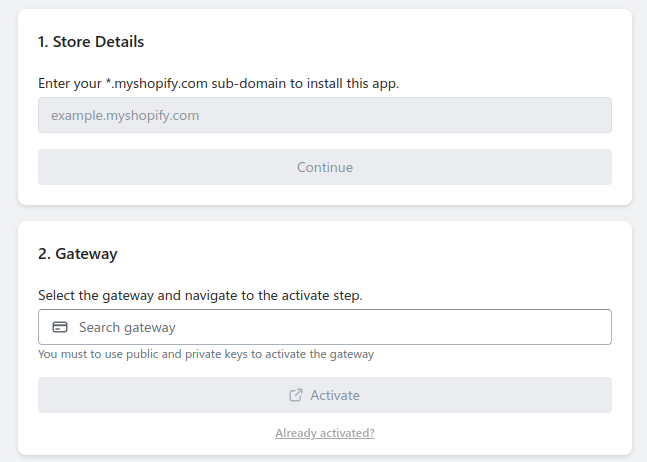
- Check the Use test mode box to connect to the Gateway’s Sandbox environment. Leave the box unchecked to connect to the production environment.
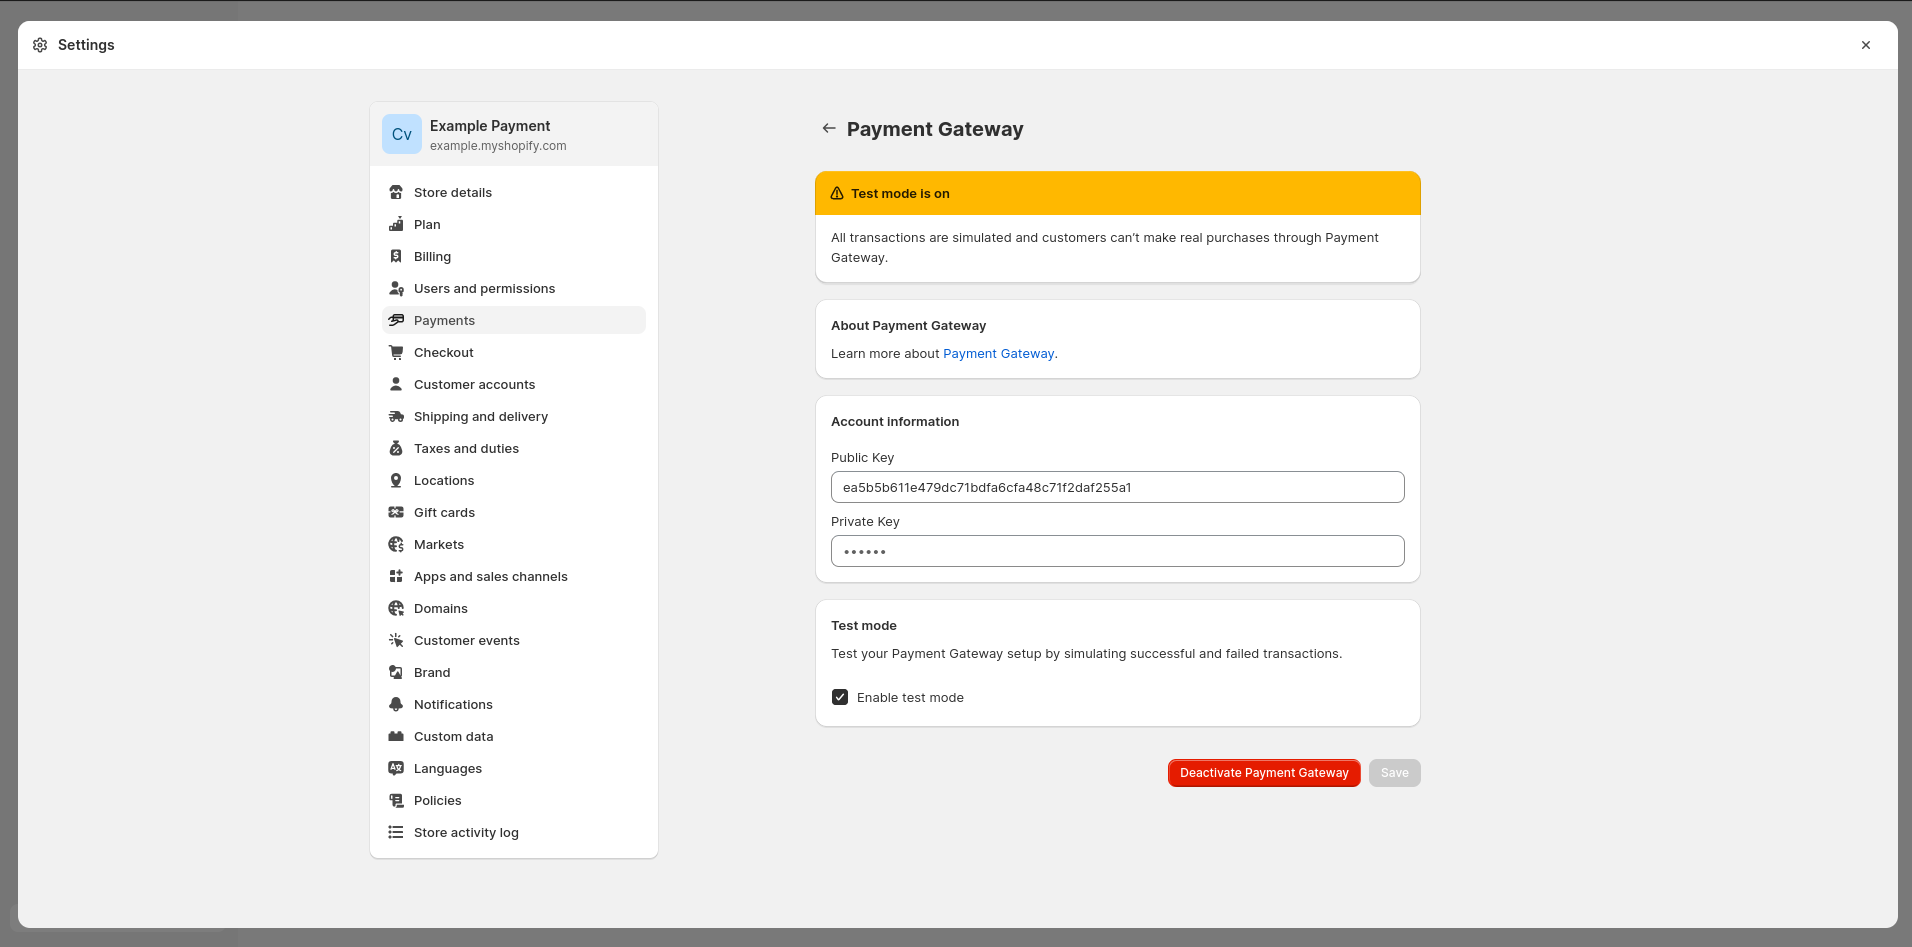
- Under Public Key and Private Key enter your Sandbox or Production merchant keys, based on
your selection in the previous step - Activate or Save
- You're done!
The payment gateway is now activated
Install the ChargeAfter Apps
ChargeAfter apps connect your store to the ChargeAfter environment. If you are using separate stores for test and production, you only need to install the relevant ChargeAfter app for each store.
Follow these steps to install an app:
- Click on Complete button to init app install
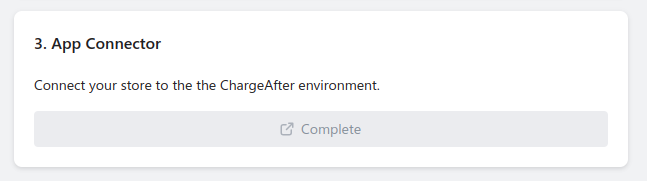
- If you are not already logged in to your store’s admin, you will be asked to log in
- Once you are logged in, the ChargeAfter Installation page will be loaded on your admin site
- Click Install unlisted app to install the app
- In the side panel, click Apps. The ChargeAfter- Production or ChargeAfter-Sandbox app should now be in your list of Apps.
Updated over 2 years ago