Post Order Operations
Overview
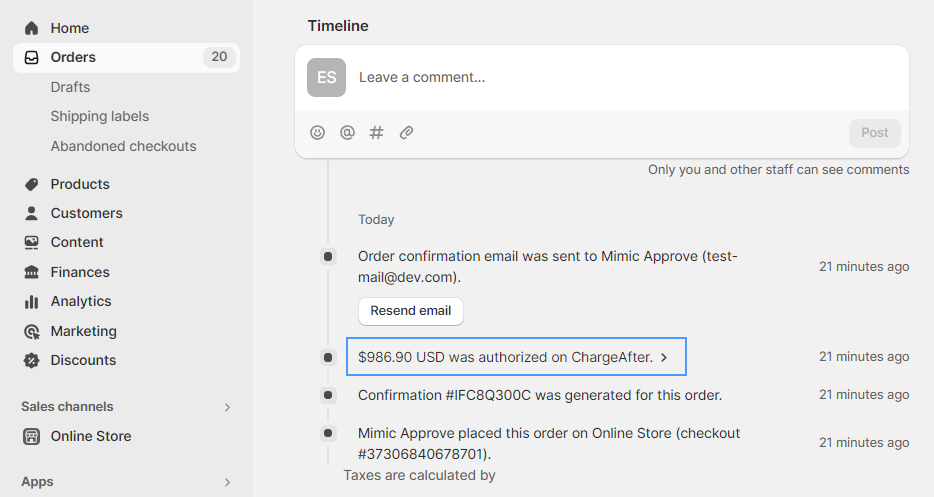
A charge is created after a consumer completes an order using ChargeAfter as a payment option. The charge will be in AUTHORIZED status initially. An entry with information about the charge will be added to the Timeline in the Order page of the store’s admin site. The entry title will say $XXX.XX was authorized on ChargeAfter, as shown below:
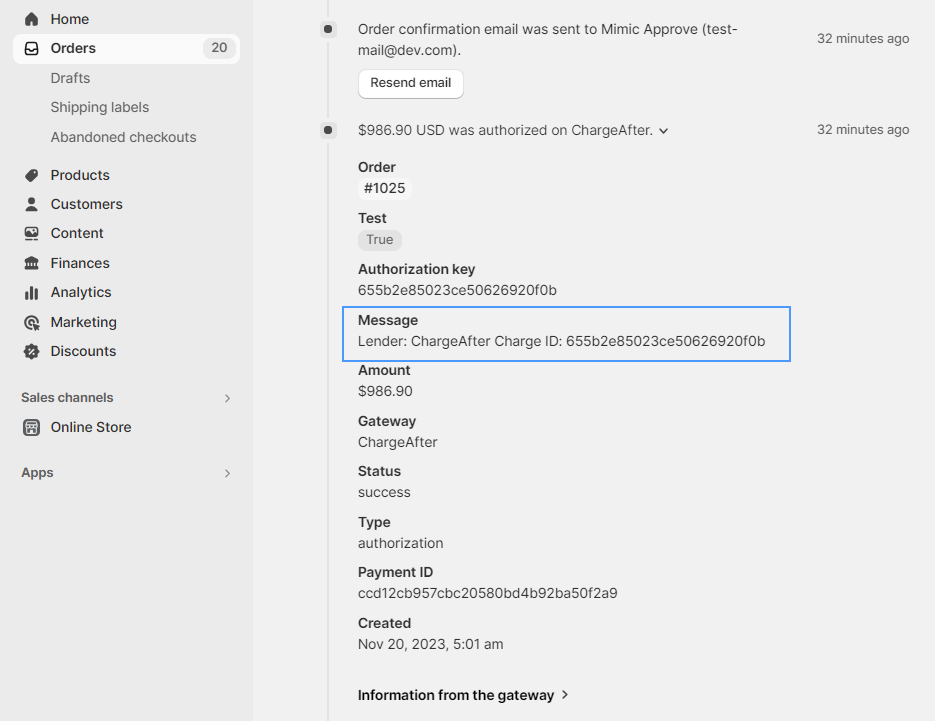
Click the entry title to expand the entry. Under Message you can find the name of the Lender and the charge ID, as shown below (you can get additional details on Information from the gateway):
The following post-order transactions can be performed on a charge from your Shopify store’s admin site.
Settling a charge
A charge can only be settled (captured) once and in full.
Follow these steps to settle a charge:
- In the store’s admin site, go to the order’s page.
- Click Capture Payment. The Capture Payment dialog pops up. The amount on the text box is the charge total. For orders made through a lender that provided an open line of credit, the charge total will be equal to the order total. For lease-to-own orders, the charge total will exclude sales tax.
- Click Accept $XXX.XX
Two new entries will be recorded in the Order’s Timeline:
- The first entry will say A $XXX.XX USD capture is pending on ChargeAfter
- The second entry will say $XXX.XX USD was captured on ChargeAfter
Note that it may take several minutes for the second entry to be added to the timeline.
Once the two entries are added, the Timeline should look as follows:

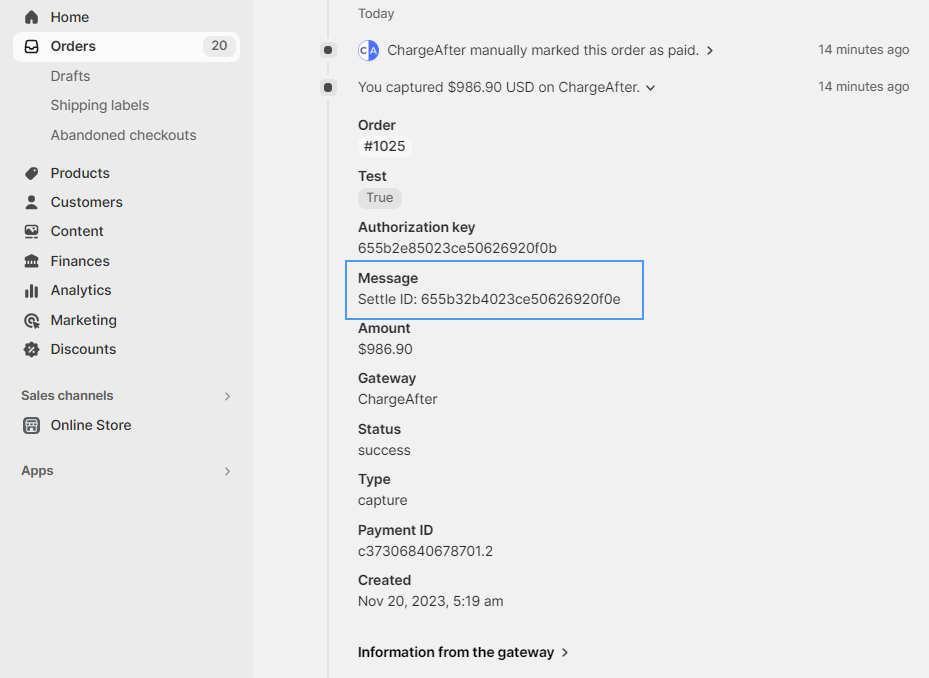
Note. For lease-to-own orders, the captured total will exclude sales tax. ChargeAfter automatically marks orders as fully paid
The settle transaction ID will appear in the second entry (the one on top). You can find it in the Message as shown below (you can get additional details on Information from the gateway):
Refunding a charge
A charge can be refunded either partially or fully. Multiple partial refunds can be issued.
Follow these steps to refund a charge:
- In the store’s admin site, go to the order’s page
- At the top of the page click Refund items
- Select the items you wish to refund
- Under Refund shipping enter the shipping amount you wish to refund.
- Go to the Summary section. The REFUND AMOUNT should be updated accordingly.
- Click Refund $XXX.XX
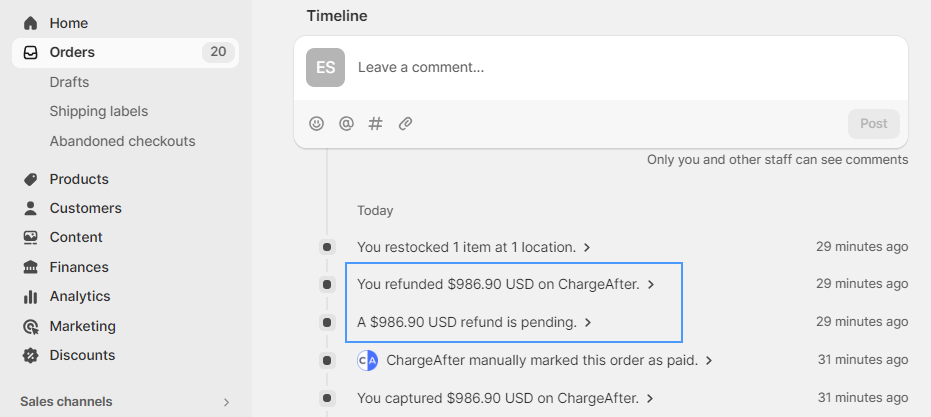
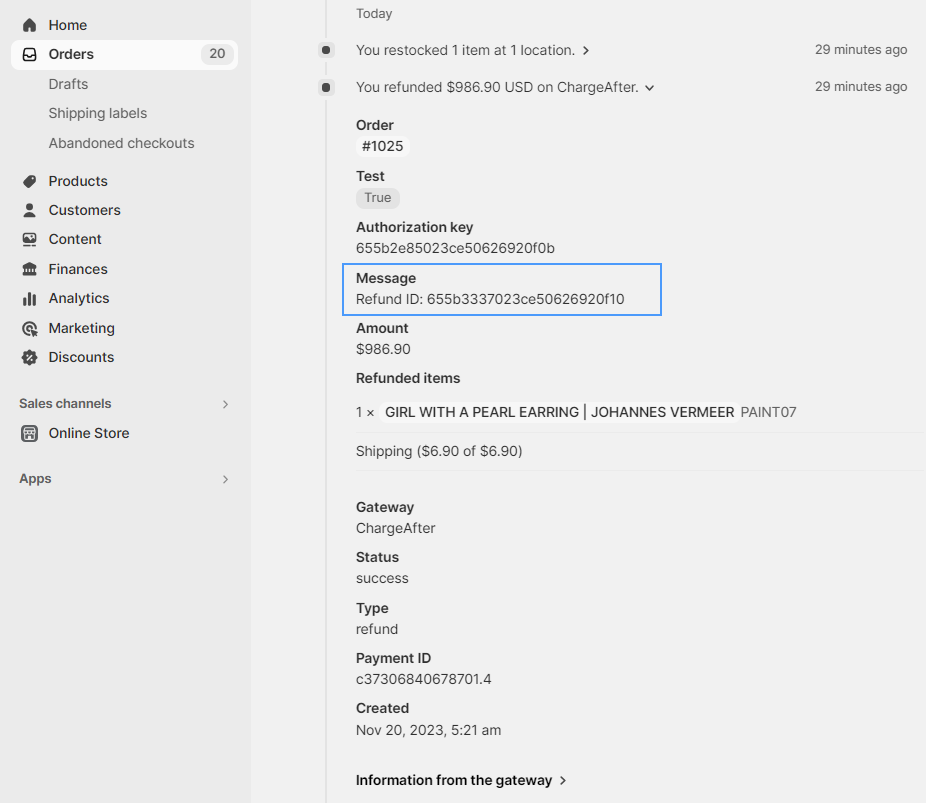
Two new entries will be recorded in the Order’s Timeline. The first entry will say A $XXX.XX USD refund is pending. The second entry will say You refunded $XXX.XX USD on ChargeAfter.
Note that it may take several minutes for the second entry to be added to the timeline.
Once the two entries are added, the Timeline should look as follows:
The refund transaction ID will appear in the second entry. You can find it in the Message as shown below (you can get additional details on Information from the gateway):
Voiding a charge
Canceling an order that was placed through ChargeAfter has the effect of voiding a charge.
Follow these steps to void a charge:
- In the store’s admin site, go to the order’s page.
- At the top of the page click More actions and select Cancel order. The Cancel order dialog pops up. Please do not change the Shipping amount.
- Click Cancel order.
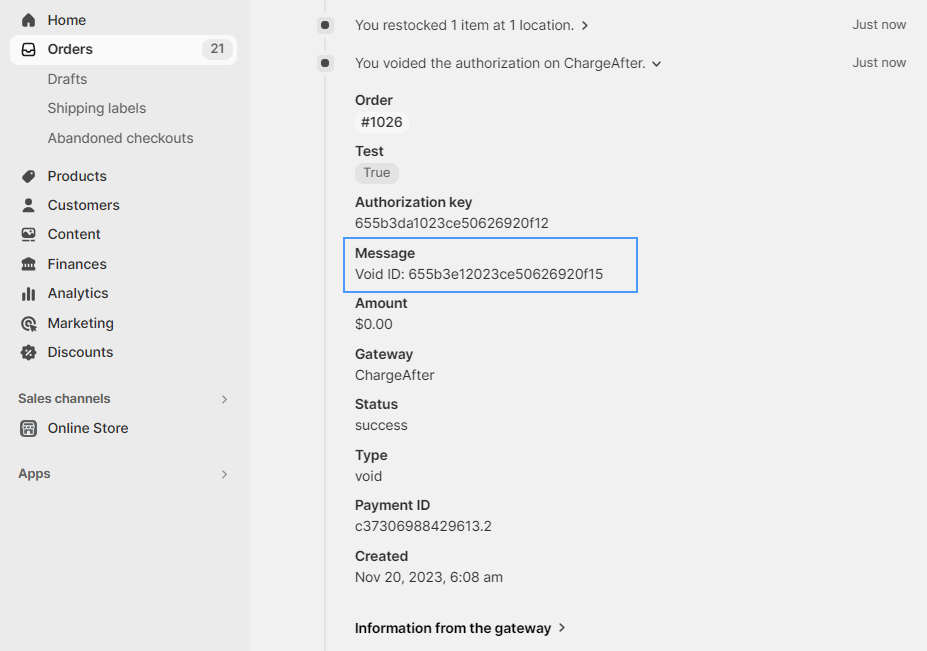
Two new entries will be recorded in the Order’s Timeline. The first entry will say Void of a $0.00 USD authorization is pending. The second entry will say You voided the authorization on ChargeAfter.
Note that it may take several minutes for the second entry to be added to the timeline.
Once the two entries are added, the Timeline should look as follows:

The refund transaction ID will appear in the second entry. You can find it in the Message as shown below (you can get additional details on Information from the gateway):
Updated about 1 year ago