Lease-to-Own & Warranty Products
Overview
If you offer lease-to-own payment options, indicating products in the cart are leasable or are warranty items will be required. The ChargeAfter Payment app treats all products as leasable or as a warranty item by default. Follow the steps below to correctly tag products as non-leasable or warranty:
Configure Extra Feature option
-
Navigate to Admin > Settings > Apps and sales channels.
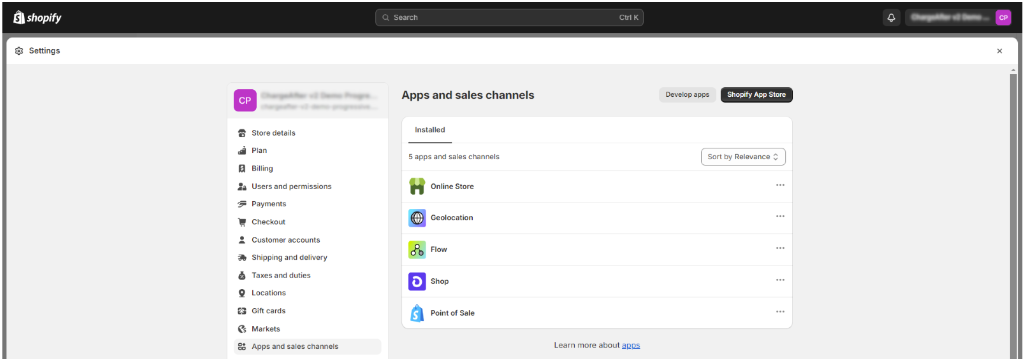
-
Click Develop Apps

-
Click on Create App, type any name and submit to create.
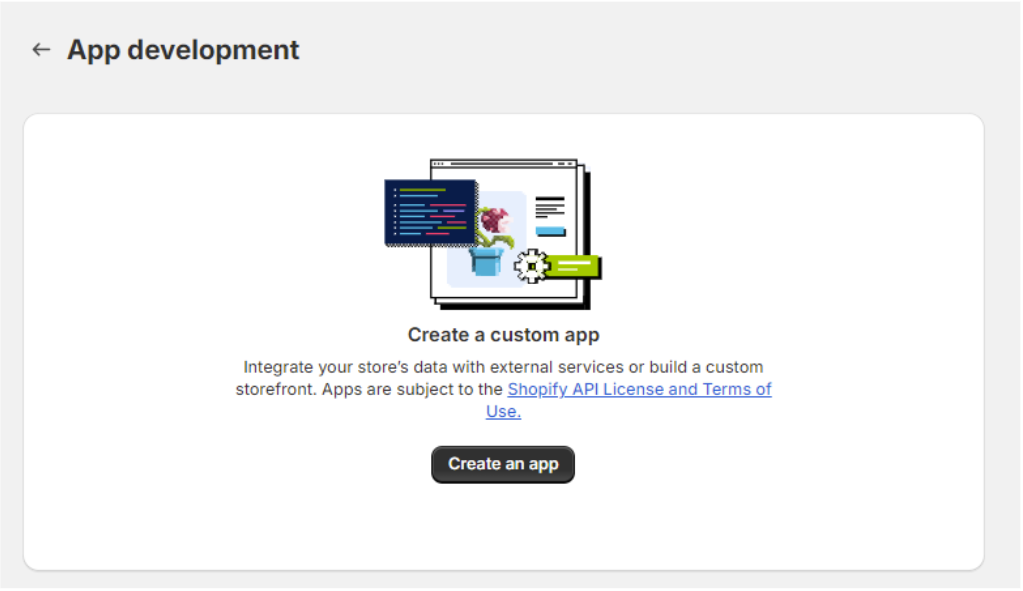
-
Navigate to Configuration tab, find Admin API Integration block and click on Configure.
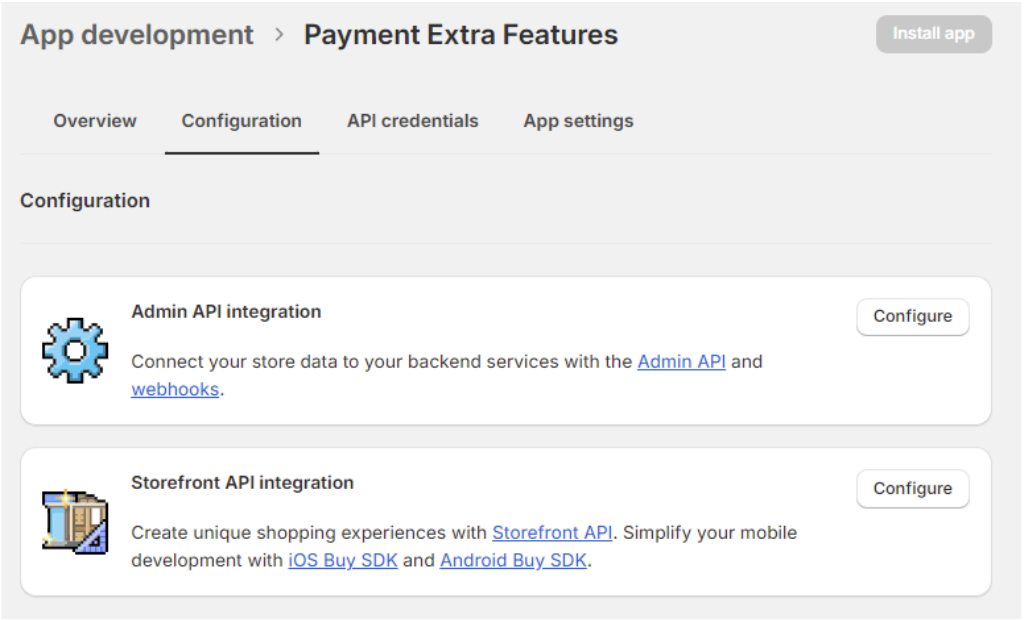
-
Type read_products scope in filter field, select the scope and save.
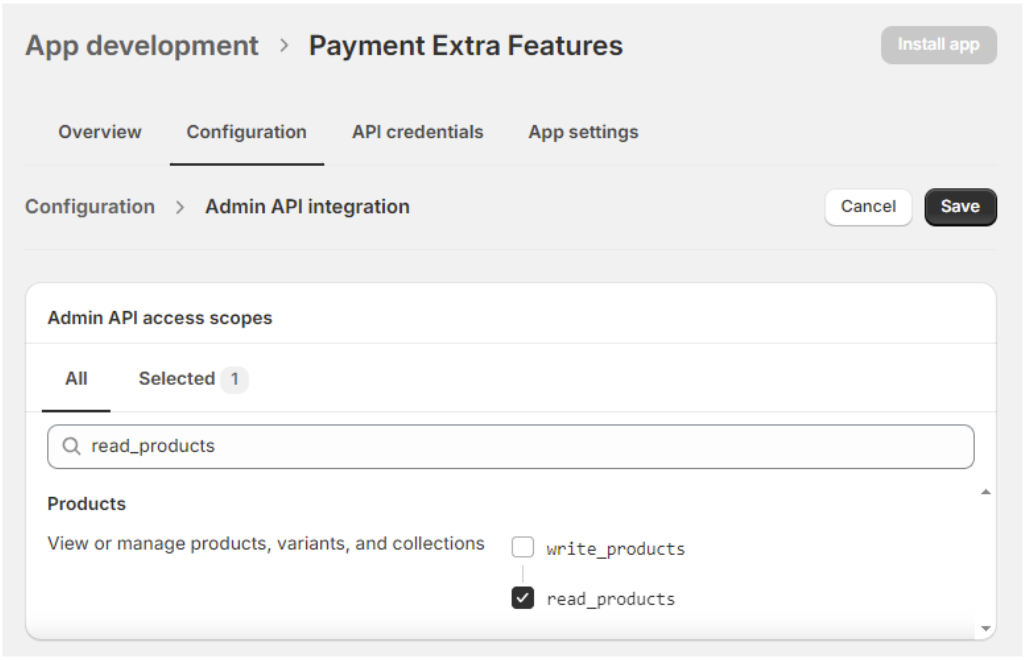
-
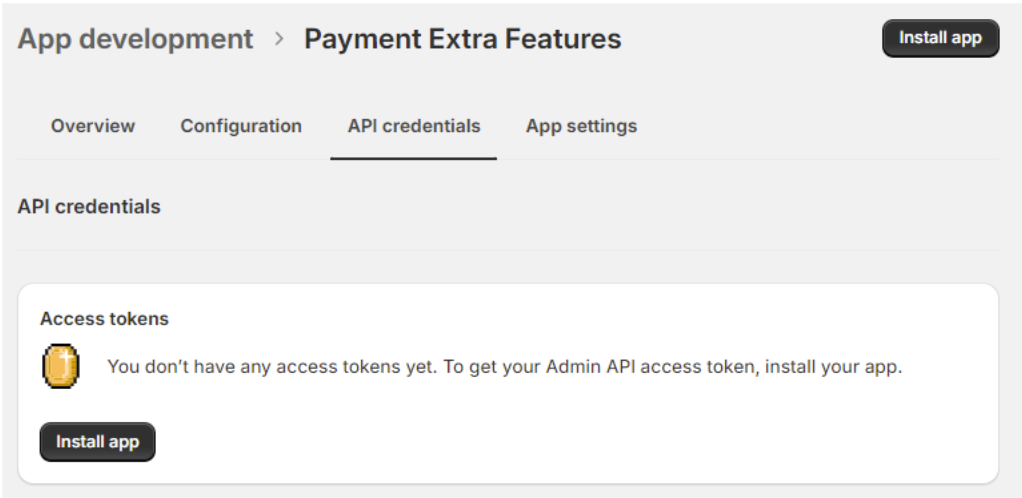
Navigate to API Credentials tab and click on Install app button.
-
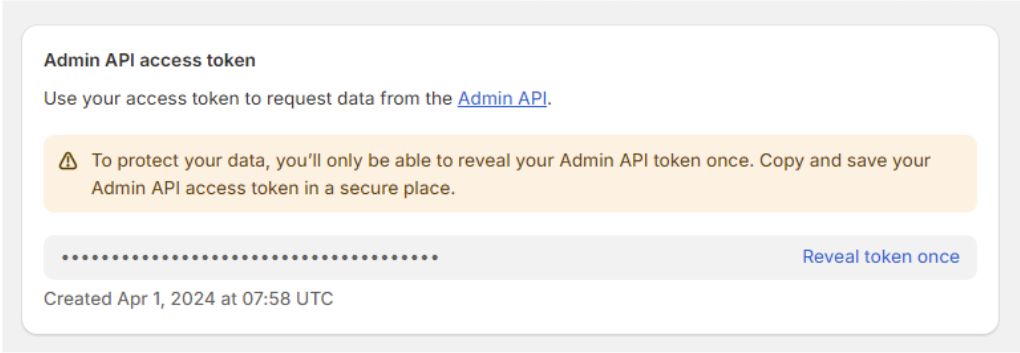
Complete app installation, scroll to Admin API access token click on Reveal token once action and copy the new value.
-
Navigate to Admin > Settings > Payments, choose the payment method and click on Manage button.
-
Scroll to Extra Features section and paste copied access token in the next field, save changes.
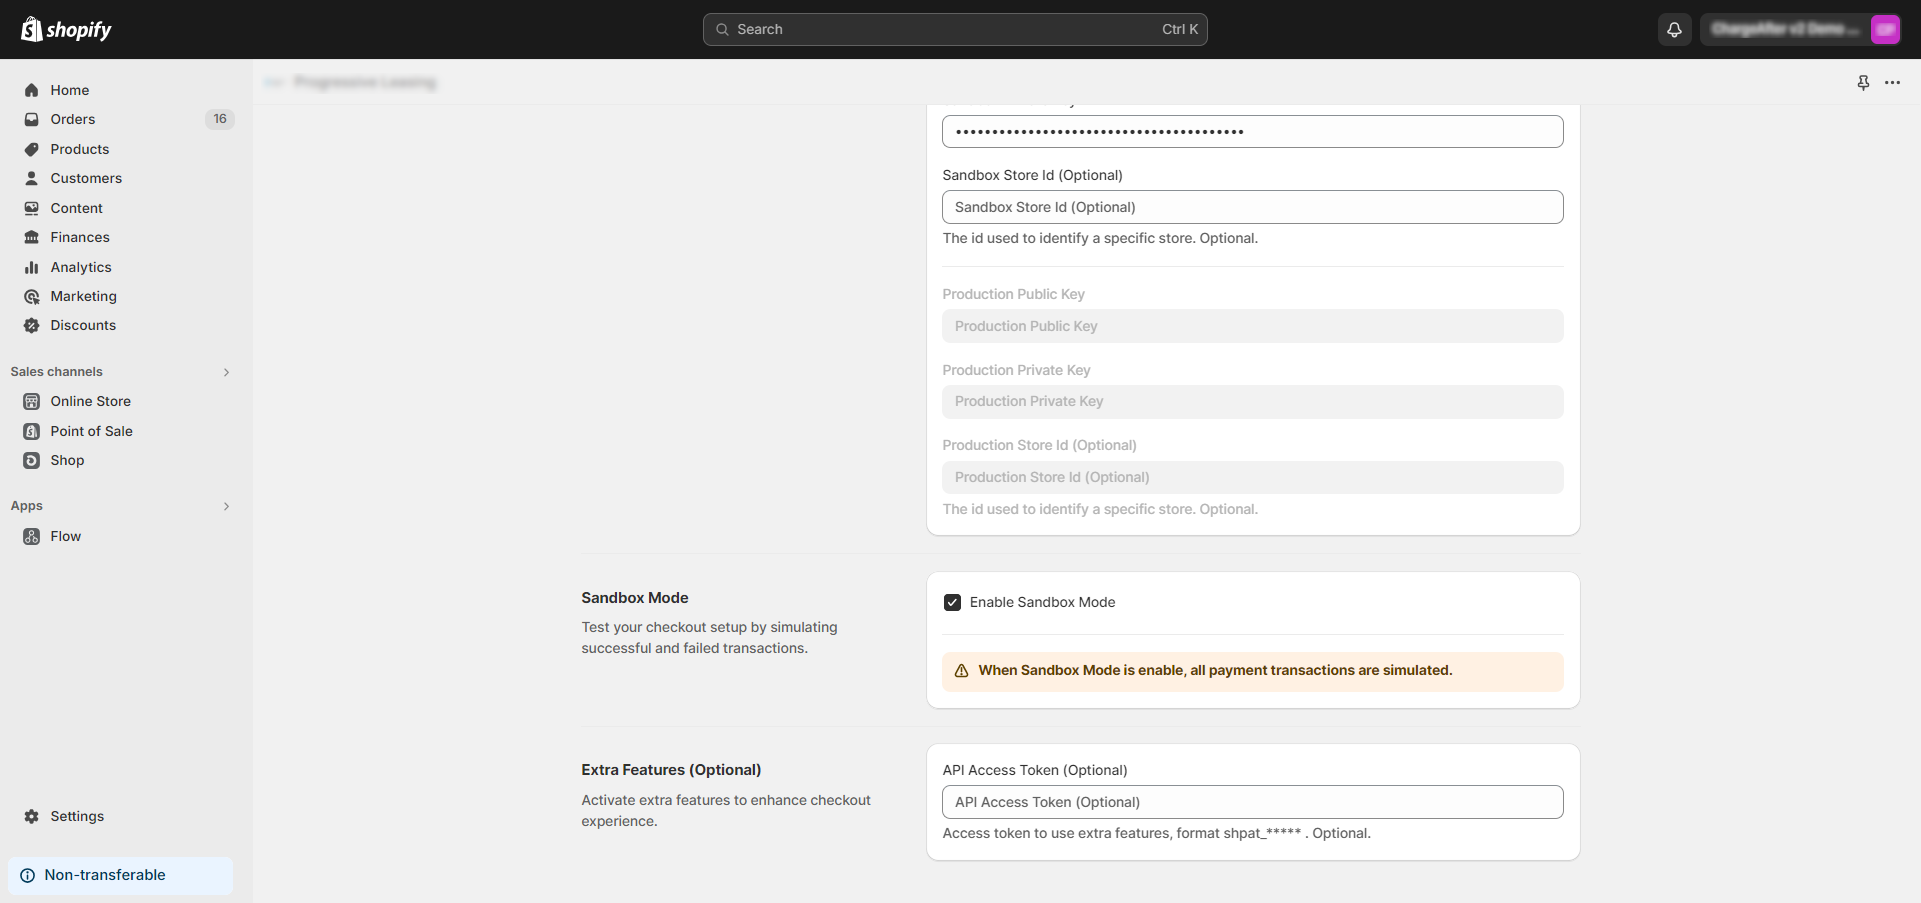
Settings Page
Tag Product as Non-Leasable
- From the Admin, go to the Product details page.
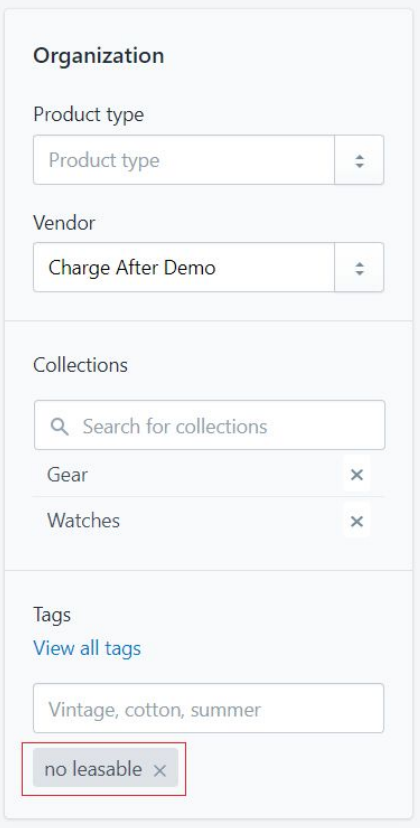
- In the Organization section, under Tags, enter the words “no leasable” and press Enter.
The product should now be tagged as no leasable as shown below:
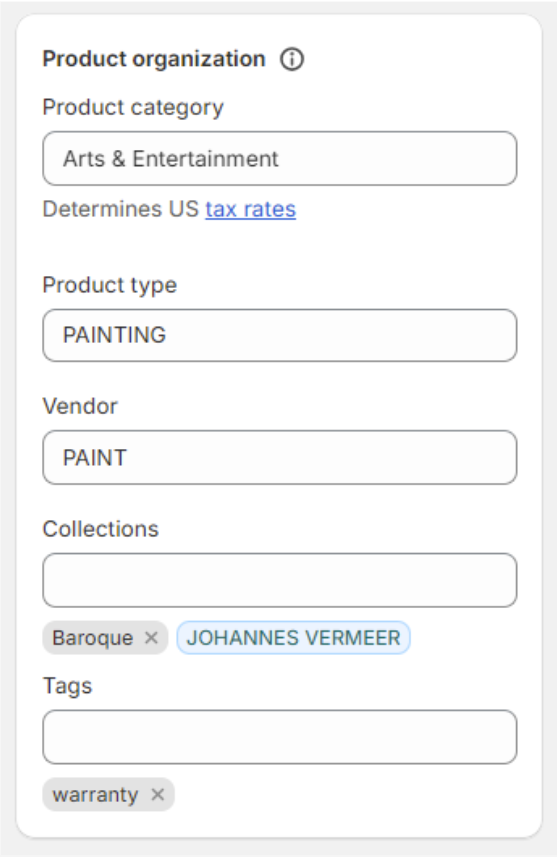
Tag Warranty Items
-
From the Admin, go to the Product details page.
-
In the Product Organization section, under Tags, enter “warranty” as pictured below and press Enter.
Updated 9 months ago
